Friday 31 December 2010

Happy new year...

to everyone. Hope you are still making the most of your Christmas holidays, we're still working our way through a mountain of food we stocked up on!!

We're off to our traditional New Years Eve Indian meal, down the road, then all round to Nathan and Clare's new house (which they just moved into a week before christmas in the snow, but luckily it was just across the road, so Nathan and I now live on the same side of the road!) to see in the new year.

We have to show a picture of the tree - the 7ft tree! When we unwrapped it, it filled the whole of the front room! Here it is even after chopping half of it off! I don't think we'll be sending Chloe to pick out another one again, I feel sorry for Chloe's boyfriend who managed to bring it home on his back whilst dad was walking behind watching! Plus the unlucky one who gets that end of the sofa can't see anything : )


Here's Maisie with a few of her new presents - she got so many she even started to get bored unwrapping them all so we saved some for boxing day and here she is with her new favourite hobby, painting...... she's doing so many we're thinking of selling them......

Friday 17 December 2010

Recycled Mini-beasts.......

Here some of you are making your lovely little creations......


with just a little sprinkle of help.....


and here are some of your colourful creations brightening up the tree.....


They looked fantastic!!
Not many ended up on the tree so I think they're hanging proudly at home in your bedrooms!

Thursday 16 December 2010

Recycled Plastic Mini-beasts workshop.......

....after a bad cold and several wisdom teeth lighter i'm finally going to show you how to make the recycled plastic mini-beasts that I did as a workshop at the William Morris gallery on Sunday 5th December. It was a great day by the way and all the finished butterflies, beetles and worms looked great hanging on the tree outside along with the origami pieces.

So first step:
You will need a selection of plastic bags, I for some reason always have a cupboard full, no idea why but it meant I had a great collection just for this purpose. The more colourful the better but even the tesco and asda ones are good to use as they all have colourful text.......


Take one of the bags and cut in two.....


Take one of the sides, fold in half and cut....


Keep these pieces together, fold in half and cut along the fold.......


Carry on with folding in half and cutting along the fold until you have small strips of plastic.....


About 10 plastic bags later you'll have a little selection to make one sheet's worth of recycled plastic.....


Lay a piece of baking paper either on your ironing board or on top of a towel on a work surface and begin to spread some of the plastic bag strips down. This first layer will be seen on one of your sides so make it as colourful as you wish......


Then fill the middle section. I tend to use the boring plastic bags for this bit such as white supermarket bags as it won't get seen and is just being used to thicken up your plastic sheet....


Then layer the top with the colourful ones again, this christmas M&S one looked great with lots of red and green. Just be aware here that the more layers you use the thicker your final piece of plastic will be but the thinner it is the easier it is for little fingers to cut out......


Then put another sheet of baking paper on top and set the iron on full heat.....


Iron all over starting from one end working to the other and watch it shrink!! It's great to watch as it shrinks so kids will love that bit. When you've done one side all over turn over and do the other side too.....


When you think you're done peel back the paper to see your handiwork. You might get a few patches with holes....


Not to worry just put some more plastic bag strips over the top to cover and iron once more with the paper over it.....


And voila, perfect......


You'll then have made your first piece of recycled plastic....


I love some of the great textures you get when the plastic melts. If you're feeling really arty and have time to spare then play with the different textures. Whoever thought plastic bags could be so artistically beautiful!
I was making mini-beasts so I created some templates, here is a wing I designed for the butterfly which I overlaid onto the plastic and cut out. If you're not that brave just draw round your template and cut out. If you're feeling a bit stuck for a template you can get some from the internet to print off to get your creativity going......


And here's my butterfly. I hole punched some holes and got the children to pin together with some good old pipe cleaners and decorated with gems.


Tomorrow i'll upload some pictures from the tree and the workshop to show you the amazing creations that the children made. This is a really cheap and easy technique that could keep children entertained for ages, they can even make some Christmas tree decorations for their rooms.

Tuesday 7 December 2010

Pics from the E17 Deisgners Christmas Event......

here's the pictures I promised from the E17 Designers event....

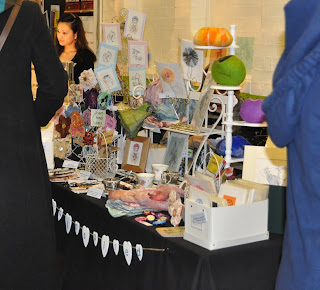
here was our stall......


and some pics of the night, after a glass of mulled wine and live music in the background I had a great night soaking up the relaxed festive atmosphere


Friday 3 December 2010

Winter Wonderland.....

Last week end we went to Winter Wonderland in Hyde Park. It was absolutely freezing but an amazing feast for the eyes with an extra dose of festive spirit. Everything you cast your eyes on was Christmas themed so at night time it was lovely.

Here's a few pics which don't really do it any justice, especially as I haven't quite mastered the night settings on my camera, so you should go and check it out for yourself.


I love all the old fashioned fair ground rides they have.....


Wednesday 1 December 2010

Thanks to everyone....

who came along to the E17 Designers Christmas markets at the week end, especially on Friday night to the one we were at. It was absolutely freezing outside so thanks for venturing away from your cosy homes to support us. We had a great night, with help from some mulled wine and live music, and sold lots of items. Now we have to get busy replacing everything we sold!
I'll upload some pics soon.

In the meantime I've just seen UK Handmade's Winter edition.
So make sure to have a flick through as they have some great handmade items, bound to give you heaps of inspiration.


Monday 22 November 2010

Cute children's cards.....

After a hectic week getting things together for 'the creative fair' in Loughton we're now a bit exhausted. True to form we were still getting things together on Saturday morning a few hours before the event! Maybe one day we'll be organised and have everything ready weeks in advance so everything runs smoothly, but I can't see it happening anytime soon : )

I made some new baby and children's cards for the event with the below images and sold out.... so will have to frantically get some more ready for this week end.

Can you tell i'm broody!


Just a reminder about Friday - if you're in the area pop along and say hi and get some fabulous xmas gifts not on the high street whilst you're there.

Tuesday 16 November 2010

Upcoming christmas events....

Hi,

We've been really busy getting ready for a few christmas fairs that we're doing.
This Saturday we're going to be at
Grand Hall within 'Roding Valley High School of Performing Arts' in Loughton as part of the creative fair. It's a great idea of assembling lots of local talent including artists, designer makers and small businesses together and offering their talents to the local community. We've been a part of the E17 Designers which is on the same wavelength and it's a great opportunity to get quality items back onto the high street. Many of the unique items are handmade to a very high quality and not found anywhere else.

This Saturday doors open at 11 until 4pm and there will be
refreshments in the foodhall serving homemade cakes and cupcakes from 'frenchmade' & more.
There will also be a trendy stylist & beauty treatment's for both the adults & children.
With the children's fancy dress at 2.30pm with local performing talent on stage during the day from 'Theatre Train'. only £2.50 to get in for a whole day's worth of entertainment for all ages.


The next one we are doing is next Friday night, 26th with the E17 Designers in Walthamstow. Their markets are getting so popular that this year they're having to put on 2 due to an increasing amount of designers joining the group, and wanting to offer their talents to the local community.


Friday 22 October 2010

Sharing the love with a free photo tutorial....

At the moment i've been spending a little too much time on the internet - I started off looking for a free knitting pattern which just escalated into trying to find as many free patterns and art goodies as possible!

So I thought i'd share some of the generosity and show you a few techniques in Photoshop to create old fashioned style photos. Whenever i'm in an antique or charity shop i'm always hunting for old images to use in my graphics work. I get so excited when I do, better than a designer hand bag any day! But this is rare as unless you want to spend extortionate amounts of money there's just not many out there. So this is a really good tip to create your own.

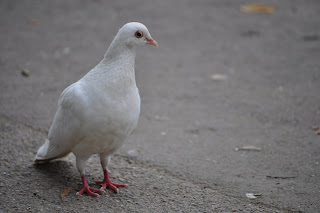
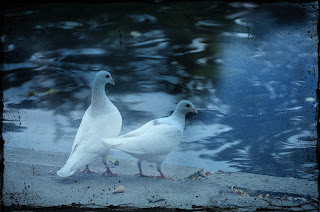
Start of with an image you want to make look old. I've got some pics here from doves in my local park, when they randomly flew by.


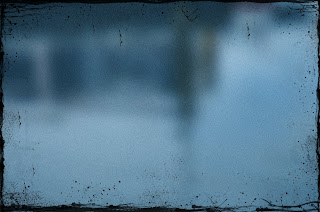
Next off you need to create a background, you can use mine if you're not that confident.
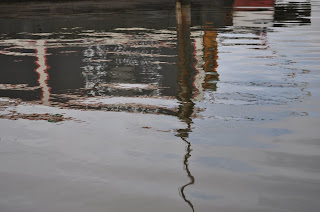
To do this I took a photo I had of water (a textured image works well, giving tones to your background image):

I then put a blur onto it. (Go to Filter: Blur: Gaussian Blur, I went really high at about 35 pixels, have the preview on and you can see how much to blur it by before applying).


My picture was a little grey so I went into Image: Adjustments: Colour Balance and increased the Cyan and Blue. You can also use this technique with family pictures, just add yellow and red to make sepia coloured backgrounds instead of cyan and blue.

I then added some noise to my image to give it some extra texture but this is just personal preference, Filters: Noise: Add Noise)


Next is to get the old fashioned scratches and marks. To do this you need to get yourself some different brushes, preferably paint splashes or grunge brushes, there are lots of websites that offer free ones to download. I've got some good ones from brusheezy. Make sure to download either PC or Mac compatible files depending on what computer you have. I use a Mac so I know that the .abr files need to be placed in: Applications: Adobe Photoshop: Presets: Brushes. Once they're loaded play around with the brush tool (selecting different brush types) around the edges of your image. I used a black brush but changed the opacity for extra depth. You only need to work on the one layer throughout this.


Now you have a background you can then overlay it onto your image. Select your background image, copy it and paste it onto your image. They need to be the same size, I had to resize my background to fit using the transform tool. The background image needs to be on the bottom with your preferred image on top i.e. the doves.

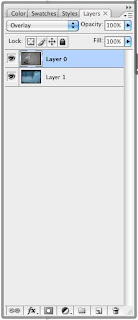
Your layers palette will look like this:


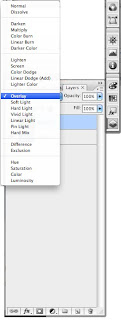
Next select the image layer and select overlay, as shown:


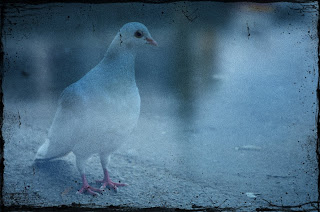
and voila.....


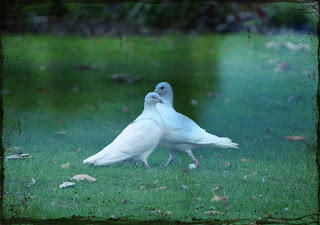
Here’s some more I made when I was playing around:


Hope you enjoy using that tip. Share any images you come up with as it would be great to see your creations.

Kirsten